Many people do forget to factor in the space that end panels take up into their kitchen design. An end panel is around 18mm – 25mm wide and they are generally used at the end of kitchen runs, on wall units either side of a kitchen extractor, at the side of tall units and between integrated appliances.
If you were going to have a 25mm end panel at each end of a kitchen run then you would have to subtract 50mm (5cm) from the overall width of the length of the kitchen run. The space left is where you need to plan your units widths to fit the remaining gap.
Remember, not all vertical walls are plumb! A kitchen run that measures 3000mm in width when measured at the bottom could measure 3005mm when the measurement is taken 1 meter up the wall! Please bear this in mind when planning as that 5mm could make all the difference if a unit is going to fit into position or not.
Are there alternatives to using end panels?
Yes. If you have a kitchen run with a unit like the one shown below, then the gap between the unit and the wall could be filled with a filler panel.
If you wanted to use an end panel and you had the same situation at the other end of the kitchen run, where the unit almost meets the wall, then simply cut the end panel in half vertically and attach the 2 pieces either side so that the smooth edges are showing.
Even though the end panels only go half as deep as the units, they will be just as sturdy, look just as good and will save you some money in the process.
End panels and extractor units
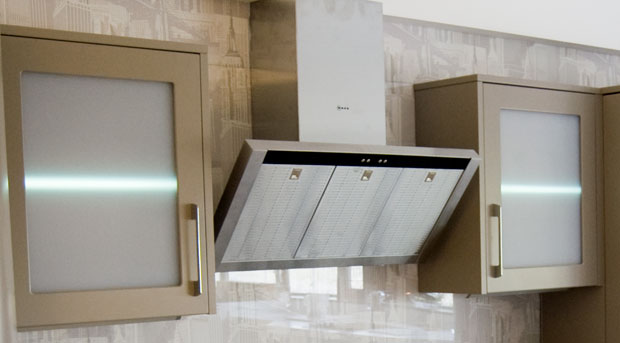
One point to really consider is, if you are having end panels at either side of your wall units between the hob extractor, then do not forget to take into account the space that these end panels require.
If you have a 600mm wide pan drawer base on the floor and you have left 600mm above on the wall section then firstly, a 600mm wide extractor is going to be a tight fit! And, if you have end panels on those wall units then a 600mm wide extractor is never going to fit! Just have a quick logic test before you buy your appliances and you’ll be fine.
We offer extractor units ranging from 450mm wide right up to 1200mm. You can see what we have available below.
https://www.diy-kitchens.com/appliances/extractors/all-brands/all-extractors/all-widths/all-colours/
Download our mobile app
Looking for some kitchen inspiration? Take a look at some of our real customer kitchens, video reviews as well as advice in our mobile app. We’ll also keep you up to date with any new ranges and offers that we have available.
Up to 50% off competitor kitchen prices
At DIY Kitchens, not only do you get a quality rigid built kitchen but you also get it at a fabulous price too! Price your kitchen up on our site and you could see savings of up to 50% off other kitchen quotes that you’ve had.
Take a look at our kitchen price comparison page here.
Real customer kitchens
Get some inspiration for designing your own new kitchen with over 3,000 pictures of our customers’ kitchens that they ordered from us.
I want to use the Luca 1250mm units but need end panels but cannot seem to see the correct size panel to use can you advise please
Hi, you would need a tall end panel and cut it down to size.
Hi there,
In our island we are having a 300mm wine fridge next to an integrated dishwasher. Is an end panel needed in between these two?
Many thanks,
Hi, it is advisable to have an end panel next to the wine fridge, so that the plinth underneath, has something to butt up to. Many wine fridges have a vent at the bottom, where no plinth can run past it. It also looks neater with an end panel too, between two appliances and gives the worktop above, extra support.
Are tongue & groove end panels available in the Malton range?
Hi, there are no tongue & groove end panels available in Malton i’m afraid. As Malton is an oak effect kitchen door, none of the other solid wood ranges would match that well because of the real wood grain pattern.
Hello, I have a run of tall units which will adjoin standard base units on the left hand side and a wall on the right. The tall units from left to right will be a single oven and microwave housing, pull out larder cupboard and an integrated fridge freezer. Please can you advise where I would need to include end panels? Thank you
Hi Catherine, end panels are only needed if the sides of the carcases do not match the look and feel of the doors, if that is the effect you are going for. End panels are optional and are put at the ends of runs of units usually. If you have a tall unit with a wall very near it then and filler panel would be OK to cover the gap.
I am having a built under double oven which fits on rails either side – do I need an end panel on units both sides or can it be attached direct onto the cabinets?
Thanks
Hi Sue, it does depend on what the units are either side. But as long as they are standard units then you should be able to attach these straight to the units on either side.
Hi I require a filler panel to go between a pull out spice drawer and a corner unit, but in the Linwood range I can only see this in the unit material (not door material). Is there an alternative?
Hi, door material filler panels are available – https://www.diy-kitchens.com/kitchen-units/filler-panels/
Unfortunately when I click the link it says “sorry no products available”. This was the problem I was having when ordering. Please can you advise?
Hi, please select the Linwood door style from the top of the screen “View/Change Door Style” then select Linwood. The items will then be available. There are 5 items in there that I can see at the moment.
Hello there
We’re interested in the Luca style for our new kitchen. We will possibly have a Le Mans corner unit ending one run but without an adjoining 90 degree base unit, in order to leave a space for the dog’s bed. Three tall units will be on this wall – I realise I will need an end panel for the last tall unit but what does the normally-invisible part of the Le Mans unit look like ie the blanking panel? Will this need, and can one affix, an end panel to this to make it look neat? Can the blanking panel be removed and a cut-down door be attached in its place to continue the J edge run along the top of all the base units on that run continue to the wall?
Many thanks indeed, Rupert
PS – any idea if the online 3D planner, outlined in the paperwork we received with our door sample, is any nearer to realisation yet? Our cutting out of units and playing with them on paper is not accurate enough!
Hi, the blanking panel on the corner unit can be removed and replaced by a gloss panel or false door if you require the “j” handle to continue.
The planning software is currently being trialed by the visitors in our showroom. No release date as of yet, as it is still being fine tuned.
Many thanks, hopefully we’ll be along for a showroom visit next month!
Hi,
I’m looking at getting a Luca Gloss kitchen but I’ve calculated that I’ll have a gap of 30mm where the last cabinet reaches a wall. What should I fill this space with? I assume an 18mm end panel wouldn’t be sufficient.
Thanks,
Alex
Hi,
You would have 2 options, you could try putting in wider wall units to fill the additional space (if realistically possible without losing symmetry) or use a piece of filler material, which are 100mm wide and can be cut down to fit.
https://www.diy-kitchens.com/kitchen-units/plinths-panels-and-accessories/filler-panels/
Or, if you wanted to be ultra creative, you could request an additional 150mm door on your order and cut it down to size, so that the handless profile goes night up to the wall as shown below.
https://advice.diy-kitchens.com/customer-questions/handleless-kitchen-design-ideas/
https://advice.diy-kitchens.com/wp-content/uploads/2015/06/5-handleless-door-filler.jpg
We’d like to frame our Innova Altino gloss kitchen units like the ones you have done in your showroom. Am I correct in thinking laminate has been used to create the dark border?
The border/frame is in the 50mm thick Cento Graphite material.
I’m looking to buy the Milbourne chalk style kitchen. I will have 720mm high and 300mm deep wall units either side of the cooker hood. I think I require 2 end panels that match the door style for these should I choose “Milbourne Chalk Wall/Dresser End Panel Profiled Front Edge”? The height of the end panel is 1560 which seems a lot as we will be using the lighting pelmet both as the pelmet and cornice to have a more modern/sleek look. How will this affect the installation?
If you are using 720 high wall units, you would purchase the 1560 panel and cut it in half and use the two exposed sides.
The panel does have a profile on the front edge but this can still be butted up alongside a light pelmet and will not affect the installation. Alternatively the panel is finished on the back edge with a straight edge, so you could cut the panel on the profiled front and use that as the back meaning the front will be straight edged.
how do i fix the filler panel above the oven, to the oven housing unit.
Hi, the filler can either be glued on with silicone or attached with L-brackets or mod blocks.