


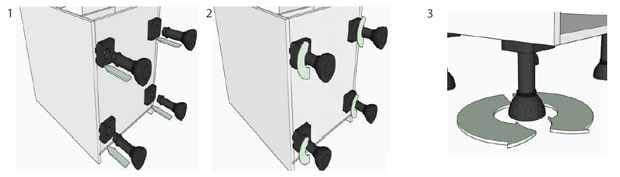
When fitting your kitchen units, it’s important to ensure that they are all square and level. To start off with, you need to lay your units on their back and slot the adjustable legs in (1) to the locked position (2).

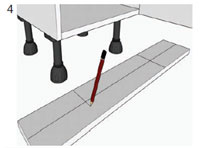
Once you have put your unit legs in and stood the unit upright, it’s a simple process of adjusting each foot section (3) slightly to allow for any slope in your floor. It’s always a good idea to have a spirit level to hand to ensure that the units are level in all directions.
Fitting the plinth

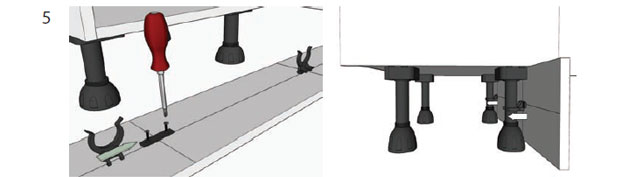
You now have the points to which you will be attaching the plinth clip back plates in a moment.
Now, screw the plinth clip back plate central to the markings made in the last step (4). Then slide the plinth clips onto the back plates (5). Finally position the plinth with the clips near the unit legs and line up with the legs before pushing the plinth into place, allowing the clips to spring around the kitchen unit legs.
Side return plinths
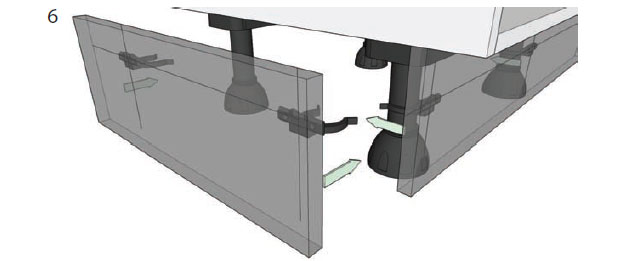
Finally, when fitting side return plinths, fit the plinth clips to the plinth in the previously mentioned way, making sure to fit the clips above the centre of the plinth. This will prevent the front clips from clashing as shown below (6).
Up to 50% off competitor kitchen prices
At DIY Kitchens, not only do you get a quality rigid built kitchen but you also get it at a fabulous price too! Price your kitchen up on our site and you could see savings of up to 50% off other kitchen quotes that you’ve had.
Take a look at our kitchen price comparison page here.
Real customer kitchens
Get some inspiration for designing your own new kitchen with over 4,000 pictures of our customers’ kitchens that they ordered from us.
