If you’re lucky enough to have an open kitchen area then you may find yourself having a bit of space to fill. The most common solution to this dilemma is to have a DIY kitchen island built and installed. This solution gives loads more kitchen storage and workspace and adds an attractive feature to your room.
Many people think that the DIY kitchen island is one big unit that looks quite complex to design and construct, but that is not the case!
The image below shows an example of a completed modern Carrera Gloss kitchen island. The rest of this article will talk about this kitchen island and how it is constructed.
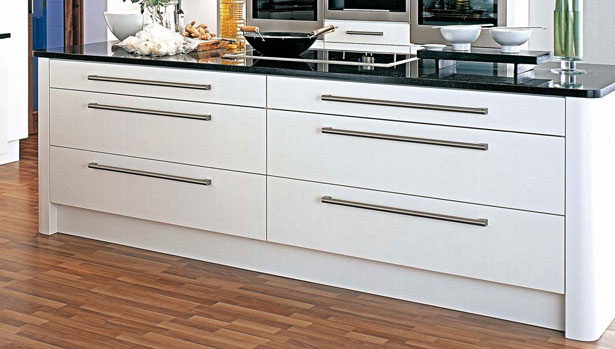
Carrera Gloss kitchen island dimensions
- The width of this kitchen island (without worktop) is 2200mm (220cm)
- The height of this kitchen island (without worktop) is 720mm from the workable kitchen units and 150mm for the unit legs = 890mm (89cm)
- The depth of this kitchen island (front to back – without worktop) is 560mm + 20mm draw fronts + 20mm backpanel = 600mm (60cm)
- Total dimensions of the kitchen island without worktop = 89cm x 220cm x 60cm
- The size of the kitchen island worktop will be 40mm wider than the width and 40mm deeper than the depth of the kitchen island to give you some worktop overhang. So the size of the worktop needed for this Carrera Gloss kitchen island example would need to be 224cm x 64cm.
Components that make up the Carrera Gloss island
The Carrera Gloss island is made up of the following components:
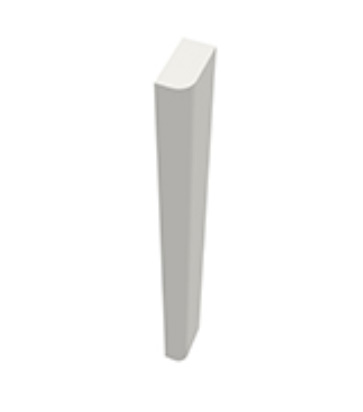 Feature End Posts
4 x White Base Radius Feature Ends
These are used to give a nice smooth curve to all 4 corners of the Carrera Gloss kitchen island. The height of these feature ends is 890mm (89cm). That is the distance from the floor to the top of the kitchen units that make up the island.
Pan Drawer Units
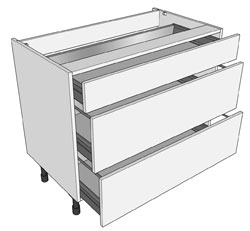
The 2 1000mm wide units are attached together to build the kitchen island up. If you need a wider kitchen island then you could have some reduced depth units on the back to give the kitchen island some more depth. With regards to the number of drawers, you could change this if you liked to 1 or 2 pan drawers and up to 3 smaller drawers in one kitchen unit. The handles are also down to you, simply choose the ones you like the look of that match the island and the other units in your kitchen.
Plinth
 Once the 2 kitchens units have been attached together and the legs adjusted, you’ll now have a 150mm by 2000mm gap to fill at the base of the units. This is done by using a piece of plinth, which is cut down to size. 150mm is the default height but smaller height plinths can be ordered instead if you decide to lower your unit legs a little. If you do lower the unit legs then the size of your feature end post will also need to be reduced.
Base End Panels
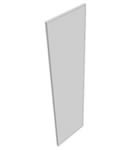
The sides of your kitchen island will now need some end panels that slot into the feature end posts to give you a smooth finish on the sides. These may need cutting down slightly to fit into the gap left between the end posts.
Back Panel
 1 x Back Panel For Kitchen Island
To tidy up the back of the kitchen island, you are going to need a back panel to complete it. This can be ordered to match the length that you need. Back panels can be ordered on the DIY Kitchens website by choosing the length that you need from the selection box on the page. All end panels are by default 900mm (90cm) high. The maximum length that back panels are to is 2000mm (200cm)
Utilising the kitchen island
 When planning a kitchen island, it’s very important to think about how it’s going to be used now and possibly in the future. Some people use the kitchen island to hold the sink whilst others will use it to house an electric hob. All of these things have to be considered at the start as they will dictate the types of unit that you kitchen island can be made up from.
If you are going to use your kitchen island to hold a sink then you may need some serious piping work doing to get water to the island. If you are going to use it for an electric hob then you are going to need some plug sockets. The hob would be permanently plug in, so your kitchen fitter/electrician would need to place a socket somewhere inside the island but if you would like some additional plug sockets then you can have some that pop straight out of the kitchen island. See an example Sensio Popup Socket here.
Want to plan your kitchen island and create a paper plan mock-up? Simply download the Kitchen Planner PDFs here and start measuring up and slotting units into position.
You can start buying kitchen island units here
Kitchen island worktops
Once you have your kitchen island planned, you’ll then need decide on the worktop that you are going to use. Will you use a laminate worktop or a shiny solid granite worktop?
Click here to learn more about which worktop is right for you.
Island Examples
Download our mobile app
Looking for some kitchen inspiration? Take a look at some of our real customer kitchens, video reviews as well as advice in our mobile app. We’ll also keep you up to date with any new ranges and offers that we have available.
Up to 50% off competitor kitchen prices
At DIY Kitchens, not only do you get a quality rigid built kitchen but you also get it at a fabulous price too! Price your kitchen up on our site and you could see savings of up to 50% off other kitchen quotes that you’ve had.
Take a look at our kitchen price comparison page here.
Real customer kitchens
Get some inspiration for designing your own new kitchen with over 3,000 pictures of our customers’ kitchens that they ordered from us.
Hi I want to achieve an island 2.5m long and 1.5m wide. I would want cupboards and a drawer set one side and also be able to sit 4 people at each long side. I need to get a wine cooler at the short end and a drawer set at the other short end. How would I best achieve this please ?
Hi, we do not sell pre-set islands – as these can vary dependent on what the island needs to contain or what size the customer needs. All of our base units can be used in an island configuration. Panels can then be used around the sides to ensure everything is in matching door material.
Unfortunately we do not offer a design service, to keep our prices as low as possible we strip this service out of our offering. We do have an online 3D planning tool though, which is designed to help customers plan and design their own kitchen, which is available here.
The planner is still in its testing stages at the moment, however once you have created a design you are happy with you can submit this for a FOC plan check and one of our advisers can offer their knowledge to make any amendments to the design. Once the plain is finalised, we can look to create a quotation through the main website.
With islands then, do you have to choose from one of the pre-set sizes? Probably 1580×940 would be fine (slightly wider and longer than we’d planned, but probably OK) if we’re confined to those. Also, can you have square edges for the island and standard edges for the other worktops? It must be possible. But how do you select this in the kitchen planner?
Hi, yes, only the preset sizes on the page are available. Square edging is also available on the island pieces. Square edging is also available for ‘Standard’ worktop pieces (600mm deep) but this is only edged on 3 sides (the back is not).
It is not possible to select square edged worktops on the planner at the moment though. You would need to add these items afterwards into the cart that will be created for you from your plan, by our sales team. If you require anymore advice on this, then it would be best to speak to them on 01977 608 418.
If the island is kept to 900mm width worktop (Duropal laminate), does it come cut and edged on all 4 sides to the dimensions selected, or does this cutting and edging have to be done during fitting?
Hi, you would use one of our square edged laminate worktops (breakfast bar or curved island), which are finished on all 4 edges. You would need a piece that is 940mm wide for a 900mm wide island. This gives you the 20mm overhang on the edges. An example of a squared edged worktop is shown here
Hi there. I have space for a 9ft by 4ft island. What would be the best option? At the moment, I’m left with some gaps in the centre of the island because of the depth of units – is this an issue for support?
Hi, there is no set design for an island. Some island will have gaps, which you can use as leg room for a breakfast bar or just put an end panel across to cover the gap. There is an example of an island with a gap in the middle and a breakfast bar on this page here. This page is full of kitchen islands, which may give you some ideas and inspiration.
Hi
I’m planning an island with full depth units on one side and shallow units on the other. What do I use for the end panels at either end?
Hi, this article will be a useful read and it will tell you what to use, on the sides of your island.
Hi, how would we build a bespoke cupboard from your Helmsley range please? It needs to be 700w by 700 deep, to house a freestanding washing machine, and shelves for laundry etc.
Hi, we do have the 700mm wide units available on our website, which we are able to make at an extra depth for you for a surcharge, although most appliances such as free standing washing machines and dryers would not fit inside a unit. Usually with free standing appliances, as long as they are no wider than 600mm wide, you would use a 600mm wide door to cover the front of the appliance, which will need to be hinged to an end panel or following unit with the easy fit hinge system, when using this hinge system the units will need to be pulled forward of the wall by at least 50mm.
Do you advise bolting/fixing the island to the floor, and how can this be done?
Hi, the weight of the units and worktop will be sufficient for keeping the island in position but if you do wish to secure it then you would have to drill and plug the floor and use L brackets and conceal them on the inside of the carcases, prior to adding end panels.
Looking to create an island to include bar stools around 3 of the sides, is there a minimum and also maximum size of overhang that would not require support legs on the granite? Thanks
Hi, the maximum unsupported overhang on granite or quartz is 300mm in depth, anything over this would require additional supports, such as breakfast bar legs, end panels or a re-inforced structure.
Hello. I am looking for an island drawer unit, similar to the single 3-drawer pot storage drawers you depict on this page. How/where would I find one like it in Toronto or that ships to Toronto? I’d need the finishing pieces, too (corners, sides, back), too. As for the top, I can probably find one here in the city, if these do not come as a complete unit. Please advise ASAP.
Thank you.
Hi, I’m afraid we are based in the UK and don’t know of any kitchen suppliers in Toronoto. This Google search may be able to help you though. https://www.google.co.uk/search?q=buy+pan+drawer+in+toronto&oq=buy+pan+drawer+in+toronto&aqs=chrome..69i57.107151j0j7&sourceid=chrome&ie=UTF-8
Hi, when cutting panels/doors how do you deal with the cut edge i.e. can it be painted or edged? Or would it not be visible when used in conjunction with a corner post or feature end?
Thanks
We would advise that because all the end panels we supply are over-sized, they will always require some form of cutting down. The exposed cut edges are best hidden by being placed against the underside of a worktop and against the wall for a base end panel & to the top of the unit and against the walls for both the tall and wall units. If you are having a painted kitchen, you can also use the touch up paint we provide to paint over any cut edges you may have.
Would this design with the rounded corners work for Broadoak Alabaster units?
Hi, yes it would work as there are some radius feature ends available in the Broadoak alabaster range.
I’ve noticed a little table at the end of some of the kitchen islands in your kitchen pictures. What is this table made up of?
We don’t actually make the table you see at the end of the kitchen island. This is an accessory and its name is a console table, which if you do a search in Google, you’ll find many places that sell them. You can then paint them any colour you like to compliment your kitchen.